Introduction
TheHive is a flexible and all-in-one Security Incident Response Platform designed for SOCs, CSIRTs, CERTs, and security professionals who need to quickly and effectively manage security incidents. With a wide range of tools, TheHive simplifies incident response workflows, improves collaboration, and helps security teams investigate and address threats efficiently. It integrates smoothly with WAZUH, offering advanced features for task management, evidence handling, and threat intelligence, making it a vital resource for modern security teams.
TheHive's user-friendly design and adaptable architecture make it easy to customize and scale for any organization. Its powerful automation features reduce manual work, allowing teams to focus on critical analysis and response tasks. The platform also offers detailed reporting and analytics, providing insights into incident trends and response effectiveness, helping organizations continuously improve their security. By using TheHive, security teams can greatly enhance their incident response efficiency and effectiveness.
Top Benefits of Using TheHive
- Integration with Wazuh: TheHive seamlessly integrates with Wazuh, an open-source security monitoring solution, to enhance threat detection and incident response capabilities. This integration allows for the automatic ingestion of alerts and security events from Wazuh, enabling analysts to correlate and investigate incidents more efficiently.
- Integration with MISP: TheHive is tightly integrated with the Malware Information Sharing Platform (MISP), enabling seamless collaboration and information sharing.
- Real-Time Collaboration: The platform supports real-time collaboration, allowing multiple analysts to work simultaneously with live stream updates on cases, tasks, observables, and Indicators of Compromise (IOCs).
- Efficient Task Management: TheHive facilitates efficient task handling and assignment through special notifications. Analysts can preview and import tasks from various sources, such as email reports, Cyber Threat Intelligence (CTI) providers, and Security Information and Event Management (SIEM) systems.
- Customizable Templates: Users can create cases and tasks using a flexible template engine. This feature allows for customization with metrics and custom fields, driving team activity and identifying areas for automation.
- Evidence Management: Analysts can securely record progress, attach evidence or files, add tags, and import password-protected ZIP archives containing suspicious data.
- Observables Management: The platform allows for the easy addition and management of observables, both individually and in bulk. Analysts can import observables directly from MISP events or alerts, and utilize triaging and filtering capabilities to streamline the process.
- Threat Intelligence Integration: TheHive integrates with Cortex and its analyzers and responders to gain insights, accelerate investigations, and contain threats. Analysts can leverage tags, flag IOCs, and identify previously seen observables to enrich threat intelligence.
Hardware Requirements
The hardware requirements for TheHive depend on factors such as the number of concurrent users and their usage patterns.
| Number Of Users | CPU | RAM |
| 1-10 | 2 Core | 2 GB |
| 10-20 | 2-4 core | 4 GB |
| 20-50 | 4-6 core | 8 GB |
Operating System
TheHive has been tested and is officially supported on the following operating systems:
- Ubuntu 20.04 LTS & 22.04 LTS
- Debian 11
- RHEL 8
Installation Guide
To install TheHive, you need Docker and Docker Compose to orchestrate the necessary services.
Step 1: To install Docker on your system
Update the Package List
sudo apt updateInstall Required Packages
sudo apt install apt-transport-https ca-certificates curl software-properties-commonAdd Docker’s Official GPG Key
curl -fsSL https://download.docker.com/linux/ubuntu/gpg | sudo apt-key add -Set Up the Docker Repository
sudo add-apt-repository "deb [arch=amd64] https://download.docker.com/linux/ubuntu$(lsb_release -cs) stable"Install Docker
sudo apt update
sudo apt install docker-ce
Verify Docker Installation
sudo docker –version
Step 2: To install Docker Compose
Download Docker Compose
sudo curl -L "https://github.com/docker/compose/releases/download/v2.20.2/docker-compose-$(uname -s)-$(uname -m)" -o /usr/local/bin/docker-composeApply Executable Permissions
sudo chmod +x /usr/local/bin/docker-composeVerify the Installation
docker-compose –version
Step 3: Prepare Docker Compose File
Create a Directory
mkdir thehive-docker
cd thehive-docker
Create a file named `docker-compose.yml` in the directory and add the following content:
version: "3"
services:
  thehive:
    image: strangebee/thehive:5.2
    depends_on:
      - cassandra
      - elasticsearch
      - minio
      - cortex
    mem_limit: 1500m
    ports:
      - "9000:9000"
    environment:
      - JVM_OPTS="-Xms1024M -Xmx1024M"
    command:
      - --secret
      - "mySecretForTheHive"
      - "--cql-hostnames"
      - "cassandra"
      - "--index-backend"
      - "elasticsearch"
      - "--es-hostnames"
      - "elasticsearch"
      - "--s3-endpoint"
      - "http://minio:9000"
      - "--s3-access-key"
      - "minioadmin"
      - "--s3-secret-key"
      - "minioadmin"
      - "--s3-bucket"
      - "thehive"
      - "--s3-use-path-access-style"
      - "--cortex-hostnames"
      - "cortex"
      - "--cortex-keys"
      # put cortex api key once cortex is bootstraped
      - "<cortex_api_key>"

  cassandra:
    image: 'cassandra:4'
    mem_limit: 1600m
    ports:
      - "9042:9042"
    environment:
      - MAX_HEAP_SIZE=1024M
      - HEAP_NEWSIZE=1024M
      - CASSANDRA_CLUSTER_NAME=TheHive
    volumes:
      - cassandradata:/var/lib/cassandra
    restart: on-failure

  elasticsearch:
    image: docker.elastic.co/elasticsearch/elasticsearch:7.17.12
    mem_limit: 1500m
    ports:
      - "9200:9200"
    environment:
      - discovery.type=single-node
      - xpack.security.enabled=false
    volumes:
      - elasticsearchdata:/usr/share/elasticsearch/data

  minio:
    image: quay.io/minio/minio
    mem_limit: 512m
    command: ["minio", "server", "/data", "--console-address", ":9090"]
    environment:
      - MINIO_ROOT_USER=minioadmin
      - MINIO_ROOT_PASSWORD=minioadmin
    ports:
      - "9090:9090"
    volumes:
      - "miniodata:/data"

  cortex:
    image: thehiveproject/cortex:3.1.7
    depends_on:
      - elasticsearch
    environment:
      - job_directory=/tmp/cortex-jobs
    volumes:
      - /var/run/docker.sock:/var/run/docker.sock
      - /tmp/cortex-jobs:/tmp/cortex-jobs
    ports:
      - "9001:9001"

volumes:
  miniodata:
  cassandradata:
  elasticsearchdata:
Step 3: Run Docker Compose
Run the following command in the directory containing your `docker-compose.yml` file:
docker-compose up -dVerify the Containers Are Running
docker-compose ps
Step 4: Access TheHive Web Interface
Once the containers are up and running, access TheHive web interface by navigating to http://localhost:9000 in your web browser.
Username: [email protected]
Password: secret
Setting Up TheHive: A Step-by-Step Guide
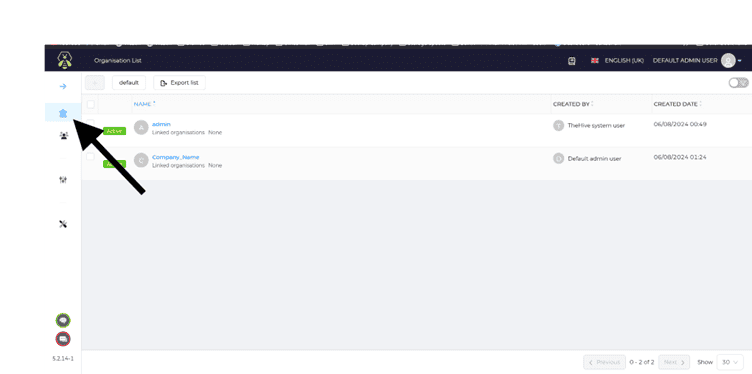
- First, we need to create an organization in TheHive. To do this, click on this icon.
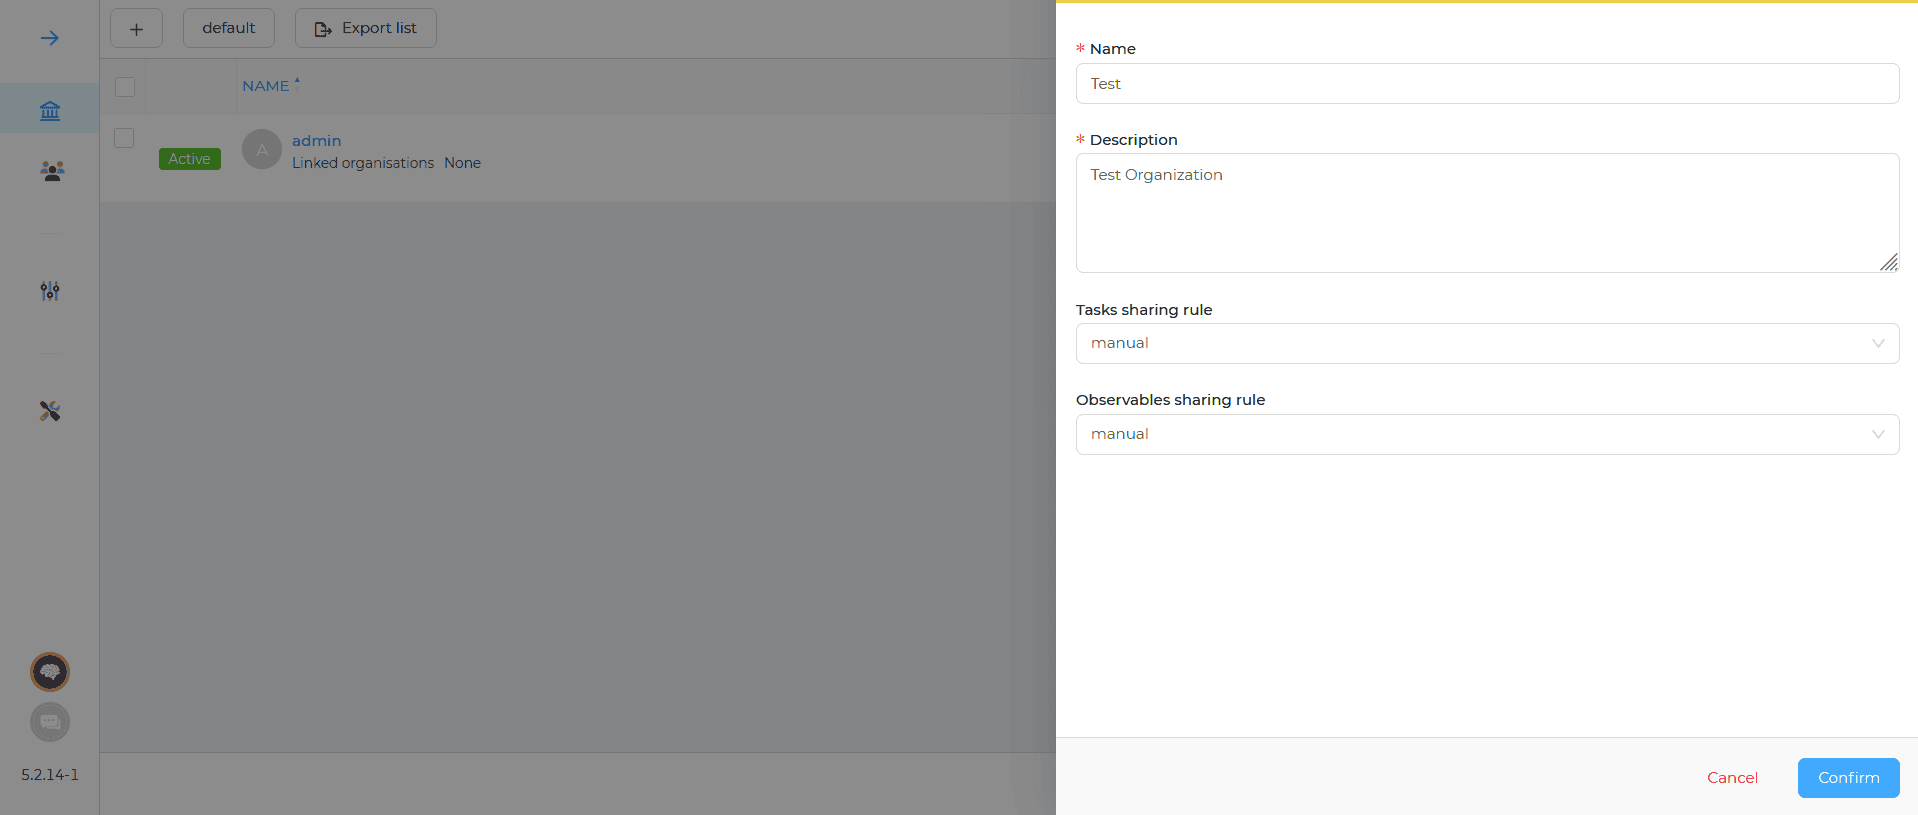
- Enter Organization Name: In the "Name" field, provide a unique name for the organization.
- Provide a Description: Use the "Description" field to add any relevant details about the organization.
- Set Task Sharing Rule: Choose a task-sharing rule from the dropdown menu. By default, it is set to "manual."
- Set Observable Sharing Rule: Choose an observable-sharing rule from the dropdown menu. This is also set to "manual" by default.
- Confirm and Save: After filling in all details, click the "Confirm" button to save the organization. If you wish to cancel, click the "Cancel" button instead.
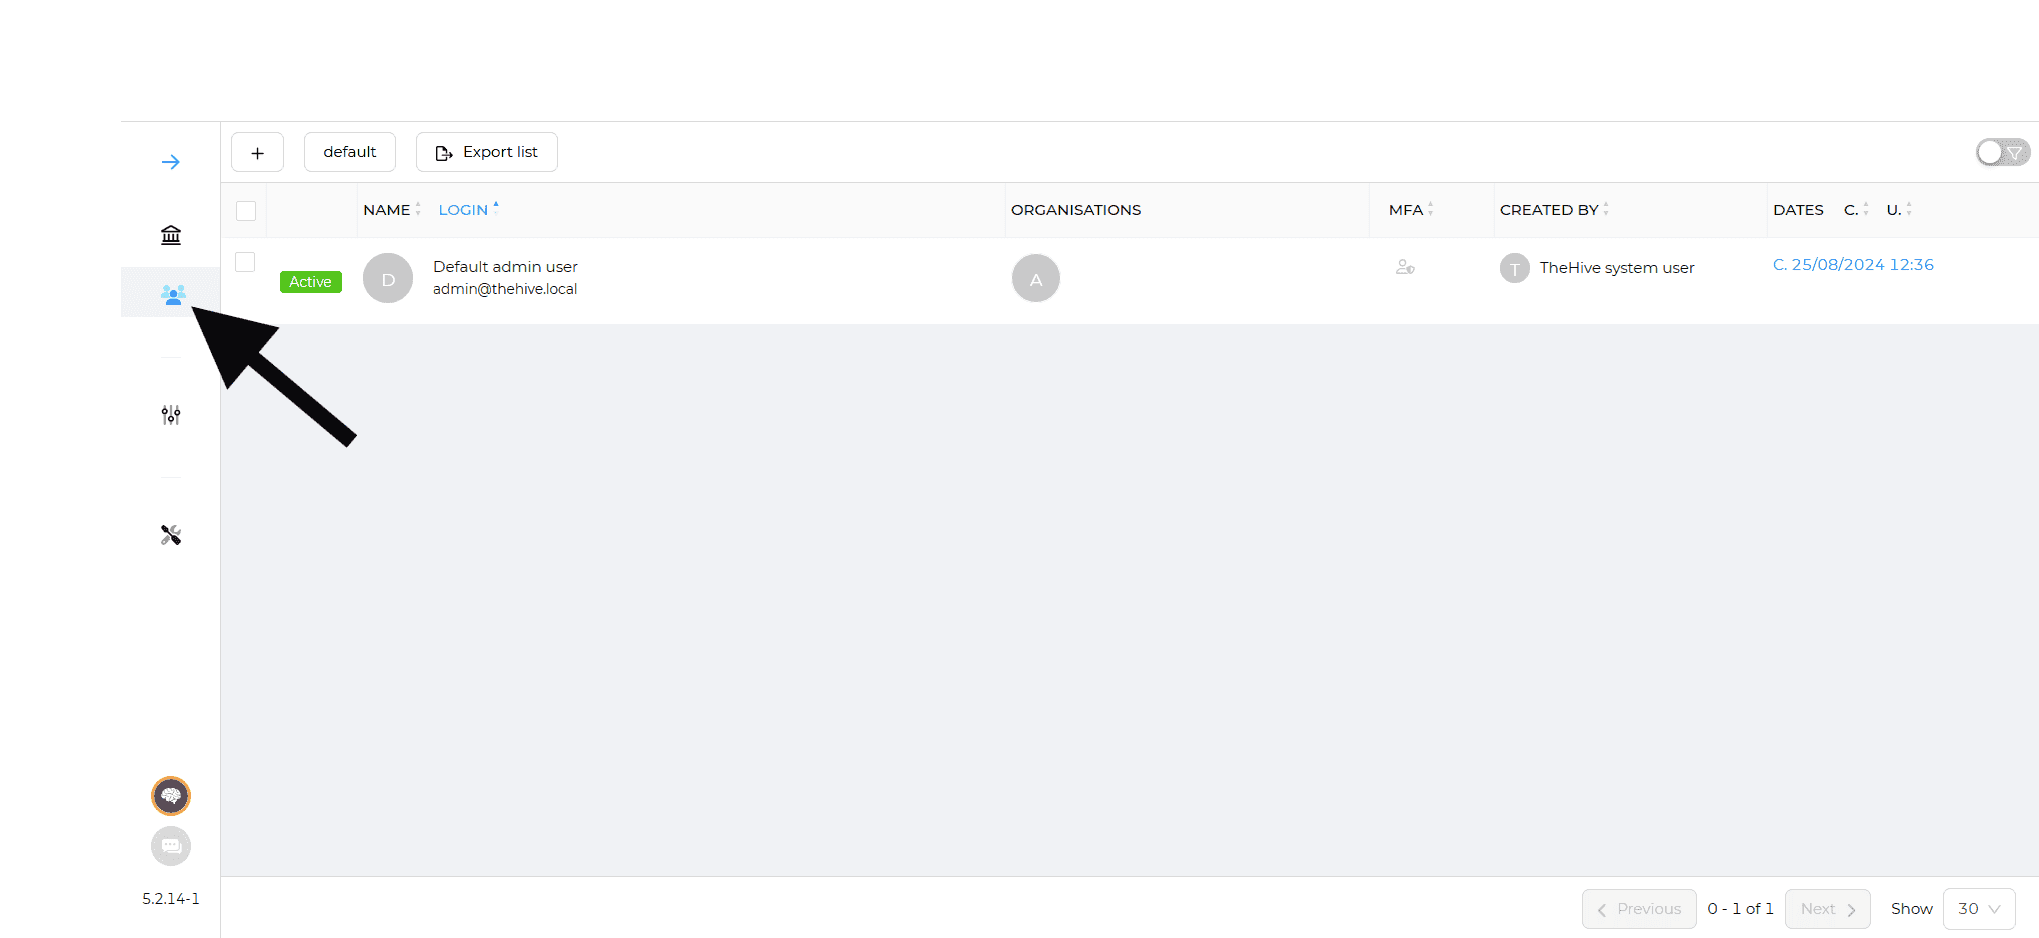
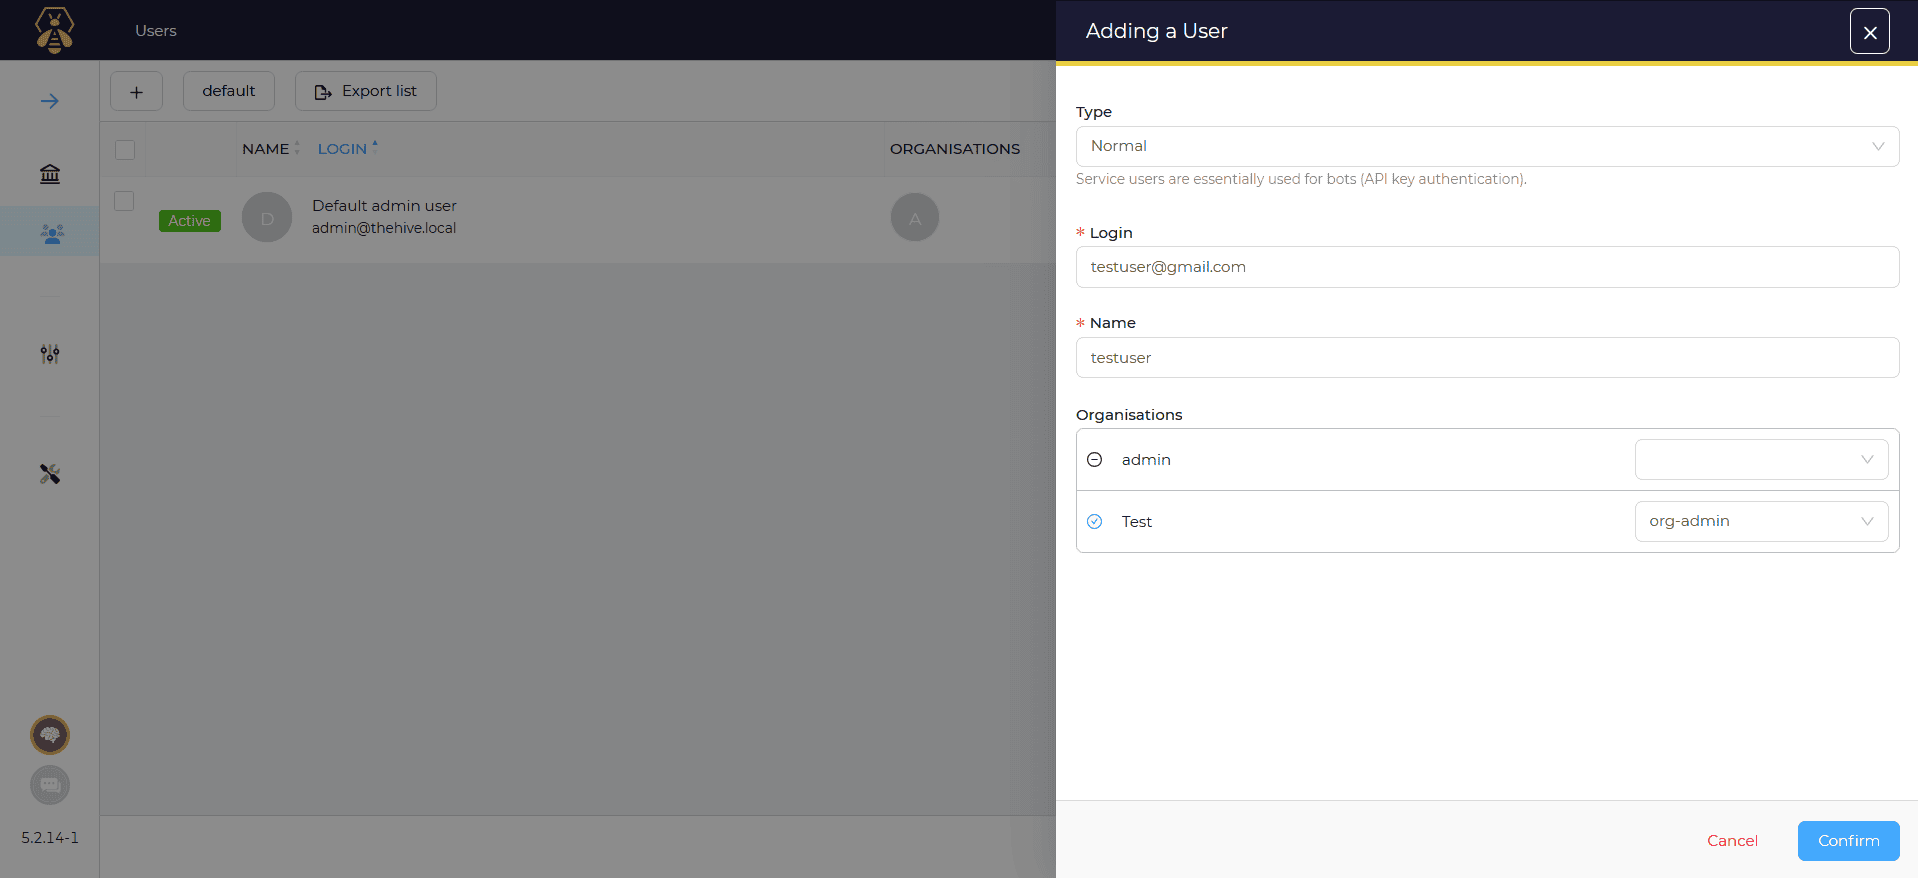
- Now, we are going to add a user to the organization we have created by clicking on this icon.
- Select User Type: Choose the user type from the dropdown menu (e.g., "Normal" or "Service User").
- Enter Login Details: Fill in the "Login" field with the username for the new user.
- Enter Name: Provide the full name of the user in the "Name" field.
- Select Organization: Choose the organization to which the user will belong by selecting the appropriate organization from the list (e.g., "Test").
- Confirm: Once all fields are filled out, click on the "Confirm" button to add the user.
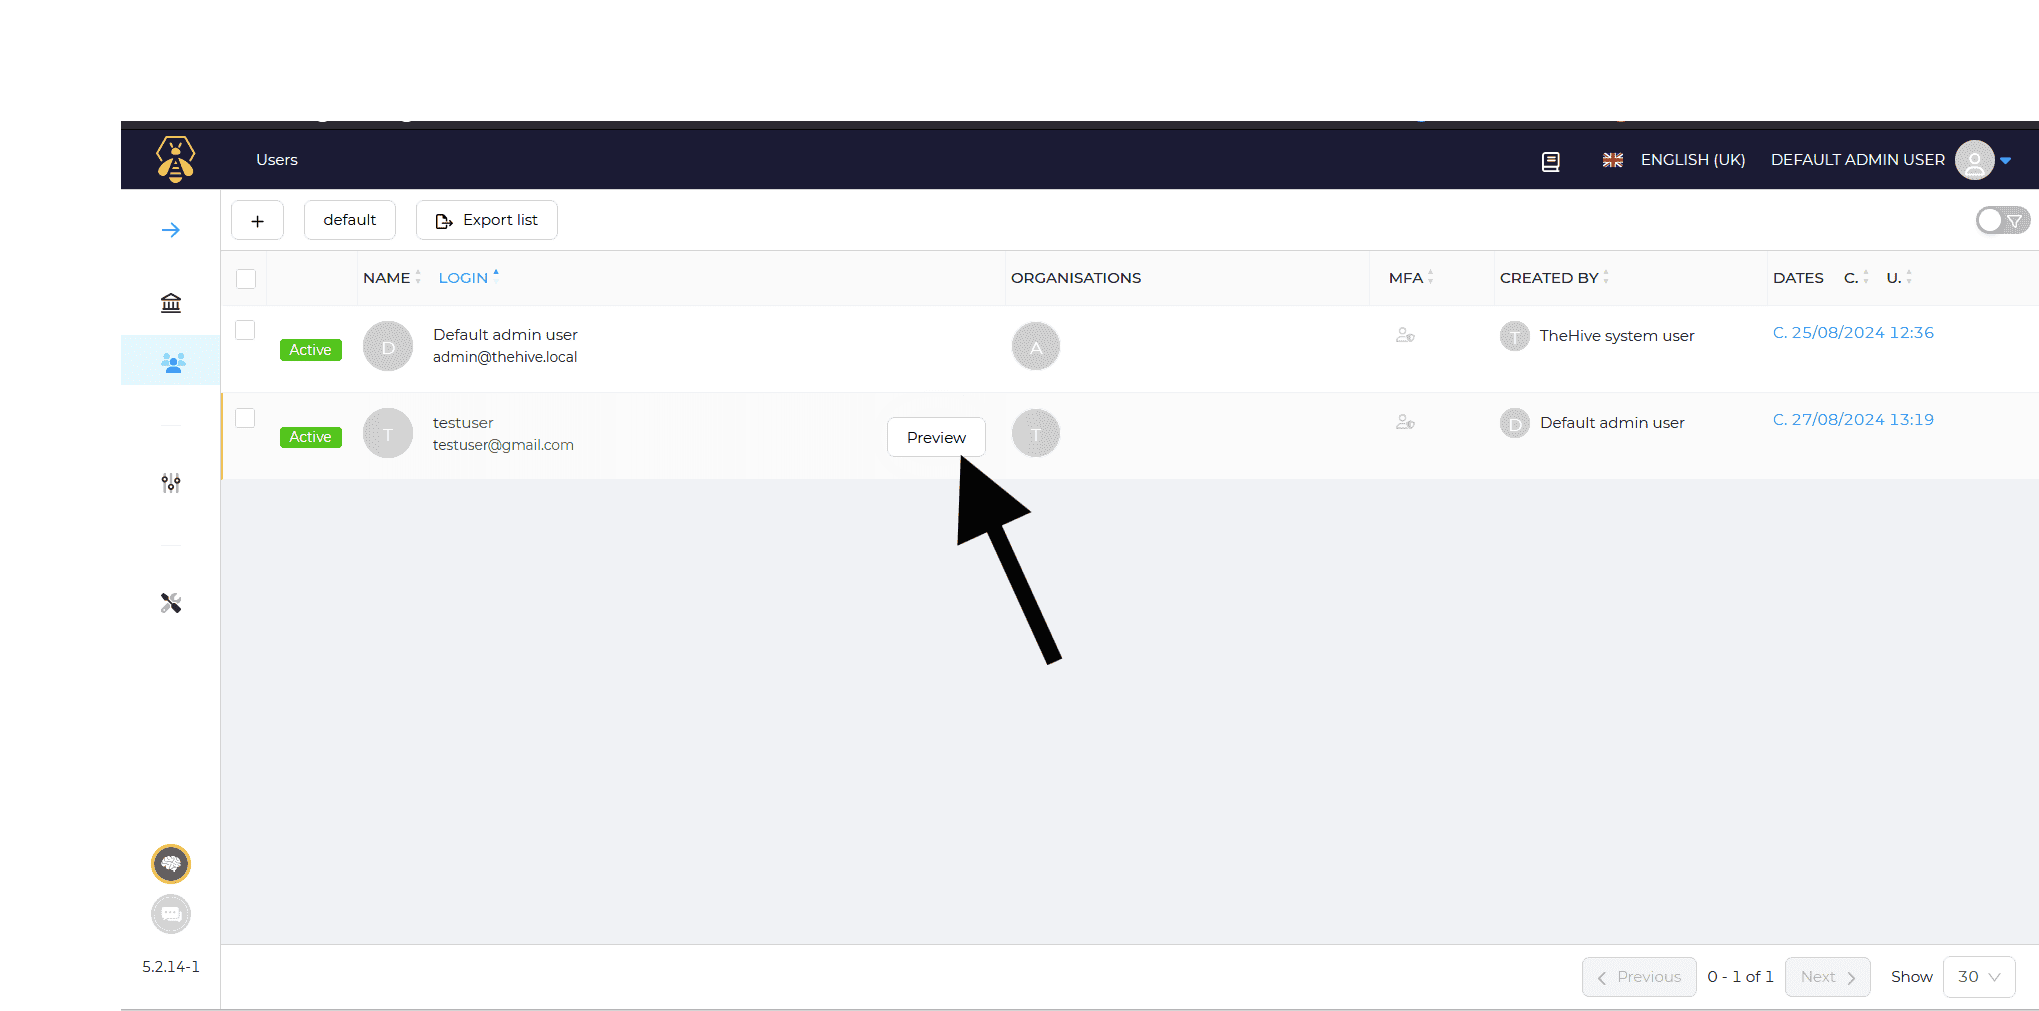
- Now you can view the user you created. Click the preview button to add the password and generate the API key.
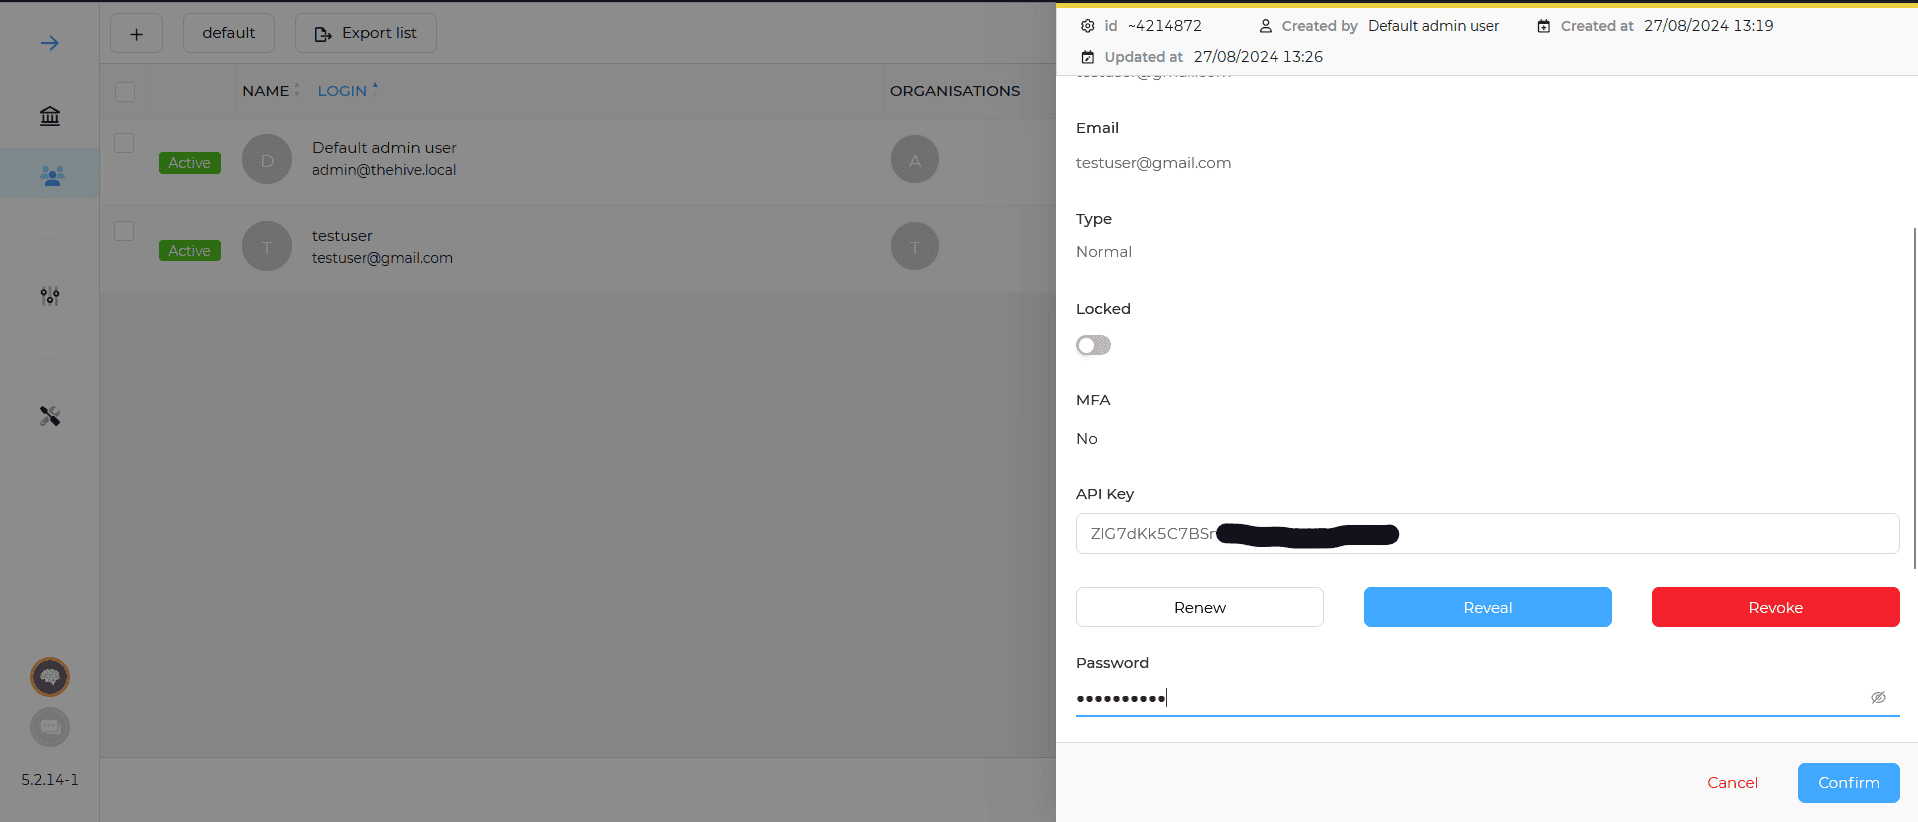
- Enter Email: Fill in the “Email” field with the user’s email address (e.g., [email protected]).
- Generate API Key: Click on the “Create” button next to the “API Key” section. Once generated, securely save the API key, as it might be revealed only once.
- Set Password: Click on the “Set a new password” link and enter a secure password following any specified guidelines (e.g., length, special characters).
- Confirm: After filling out all the necessary fields, click on the “Confirm” button to save the changes.
- Now log out from the admin account and log in with the user account you created.
Integrating Wazuh with TheHive
Step 1: To configure the Wazuh manager for integration with TheHive, follow these:
First, install the TheHive Python module
sudo /var/ossec/framework/python/bin/pip3 install thehive4py==1.8.1- Create a custom integration script by pasting the following Python code into /var/ossec/integrations/custom-w2thive.py.
WPYTHON_BIN="framework/python/bin/python3"

SCRIPT_PATH_NAME="$0"

DIR_NAME="$(cd $(dirname ${SCRIPT_PATH_NAME}); pwd -P)"
SCRIPT_NAME="$(basename ${SCRIPT_PATH_NAME})"

case ${DIR_NAME} in
*/active-response/bin | */wodles*)
if [ -z "${WAZUH_PATH}" ]; then
WAZUH_PATH="$(cd ${DIR_NAME}/../..; pwd)"
fi

PYTHON_SCRIPT="${DIR_NAME}/${SCRIPT_NAME}.py"
;;
*/bin)
if [ -z "${WAZUH_PATH}" ]; then
WAZUH_PATH="$(cd ${DIR_NAME}/..; pwd)"
fi

PYTHON_SCRIPT="${WAZUH_PATH}/framework/scripts/${SCRIPT_NAME}.py"
;;
*/integrations)
if [ -z "${WAZUH_PATH}" ]; then
WAZUH_PATH="$(cd ${DIR_NAME}/..; pwd)"
fi

PYTHON_SCRIPT="${DIR_NAME}/${SCRIPT_NAME}.py"
;;
esac

${WAZUH_PATH}/${WPYTHON_BIN} ${PYTHON_SCRIPT} $@- We change the files’ permission and the ownership to ensure that Wazuh has adequate permissions to access and run them:
sudo chmod 755 /var/ossec/integrations/custom-w2thive.py
sudo chmod 755 /var/ossec/integrations/custom-w2thive
sudo chown root:wazuh /var/ossec/integrations/custom-w2thive.py
sudo chown root:wazuh /var/ossec/integrations/custom-w2thive- To enable Wazuh to run the integration script, add the following lines to the manager configuration file located at /var/ossec/etc/ossec.conf. Insert the IP address of the TheHive server and the API key that was generated earlier:
<integration>
<name>custom-w2thive</name>
<hook_url>http://TheHive_Server_IP:9000</hook_url>
<api_key>xxxxxxxxxxxxxxxxx</api_key>
<alert_format>json</alert_format>
</integration>- Restart the manager to apply the changes:
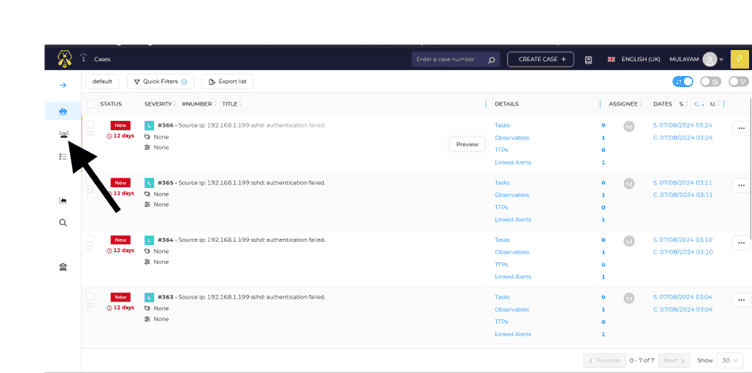
sudo systemctl restart wazuh-manager- Now, log in to TheHive using the user ID and password you created earlier. Click on the designated icon, and you should see alerts coming in from Wazuh.
conclusion
TheHive is an essential tool for modern security teams, offering a comprehensive platform for incident response management. With its robust integration capabilities, including seamless connections with MISP and Wazuh, TheHive enhances collaboration, task management, and threat intelligence integration. The platform’s user-friendly interface, flexible architecture, and powerful automation features help organizations of all sizes streamline their incident response processes. By utilizing TheHive, security teams can improve efficiency, reduce manual workloads, and gain valuable insights into security trends, ultimately strengthening their overall security posture.
References

SOC Analyst with expertise in incident monitoring, deploying SIEM & SOAR solutions for customers. Holds a Bachelor’s degree in Computer Science from Dr. A. P. J. Abdul Kalam Technical University (AKTU). Currently performing R&D on integrating AI into SOC eco-system.
Share