SecuriPi – Refining the browsing experience
Viren Punjabi
Nov 20, 2024
•
5 Min
Viren Punjabi
Nov 20, 2024
•
5 Min
TABLE OF CONTENTS
Share
Hi fellow cybersec enthusiasts, we have come a long way with the rise in technology and its integration into our lives. The internet has evolved enormously and so has the threat landscape. The algorithms today are highly personalized and tailored to generate content with the goal to increase user engagement post by post. It has been so easy to perform a search query and get information from across the globe in seconds. But the convenience comes with a dark cost of user’s privacy & tracking.
“If you are not paying for it, you're not the customer; you're the product being sold”
I’ll let that sink in for a minute. You see, this not only open up opportunities for advertisers to attack you psychologically but also open up gates for threat attackers to bind malicious stuff in different ways and has normal users become victims to such SCAMS. It’s a land mine out there. The algorithm can’t always distinguish between legitimate content and malicious content hiding in its name.
It’s not that big giants aren’t aware of this situation; they simply are taking advantage of this and making users pay more in the name of a premium subscription-based service that is theoretically supposed to “stop” this menace.
You can obviously do that and just pay for the subscriptions, but what’s the fun in that? I have just the right solution that you can DIY and improve your network which is supercool and you learning something new in the process.
Let the fun begin...
We are going to set up a pocket-sized DNS server that will act as a sinkhole. We’ll be setting up Pi-Hole which is an open-source content filtering solution that will help you counter multiple problems. You can set up parental controls to decide what web content is allowed or blocked, flag and block malicious sites that can overall help in a safer browsing experience.
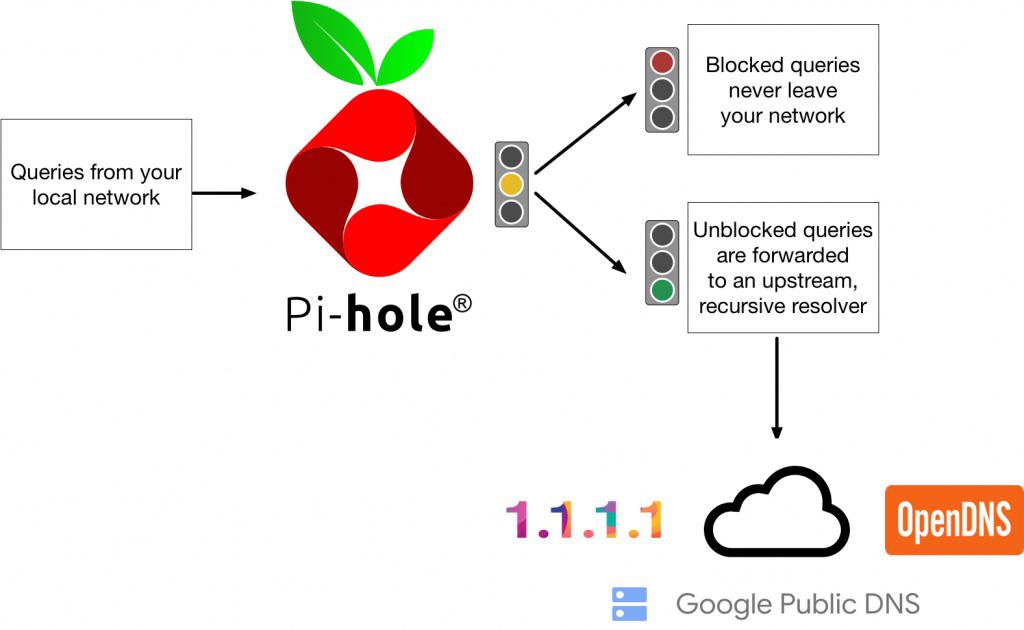
Whenever you search for something and use your browser there are multiple DNS requests sent to different addresses. This includes the site you wanted to visit along with the sites that have ads, trackers, and malware hidden within ads. When you configure a DNS sinkhole it sits between the router and clients to filter out content that is not required.
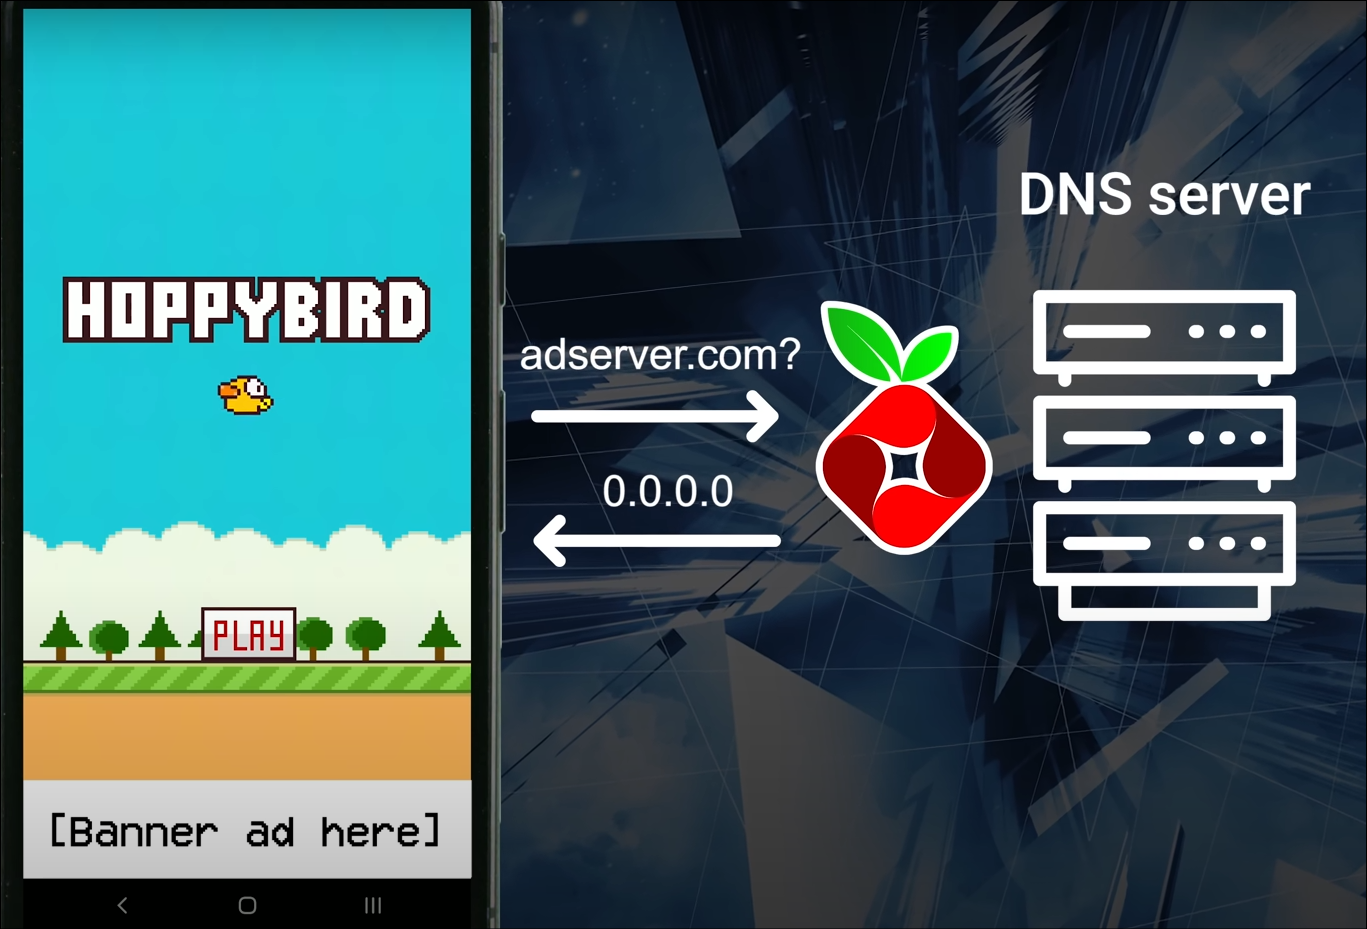
It’s not as complex as it may sound. All you need is a Raspberry Pi 0, some connectors to solve the port compatibility issues and a micro-SD card. Let’s flash the SD card with raspberry pi OS (lite) with SSH enabled. Once flashed put the SD card in the pi and power on the device. We can now ssh into the device and access it wirelessly from over computer through SSH. You also assign the pi with a local static IP to avoid any conflicts in the future. You can do that by going to your router’s configuration page and finding the hostname with its MAC address, once found bind an IP to make it static.

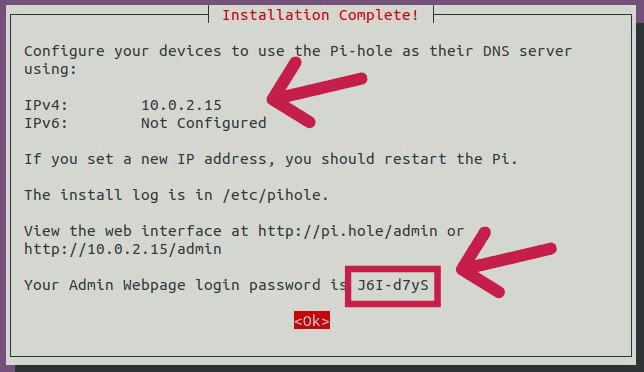
With that set go to pi hole’s GitHub repo. and manually install the pi hole serve or you can just curl the service for an automated one-click install. Follow the on-screen instructions, just make sure that you configure the up-stream DNS server correctly cause that will be the one doing all the name resolution. Once that’s done you should now have a password and a URL to access the web interface of pi hole.
Now with all that set up, let’s configure the server. There is a ton of customization possible, we can configure the domains and URLs what supposed to be blocked by adding them to the blocklist or even setup a regex to save the hassle of adding each URL manually. There is also the feature of adding lists of URLs made by the community to block content based on different use cases. This can sometimes also cause it to break the browsing as it may block certain URLs that are required for website to work efficiently. Lucky for us we can create a whitelist that will counter the blocklist to help overcome this problem.
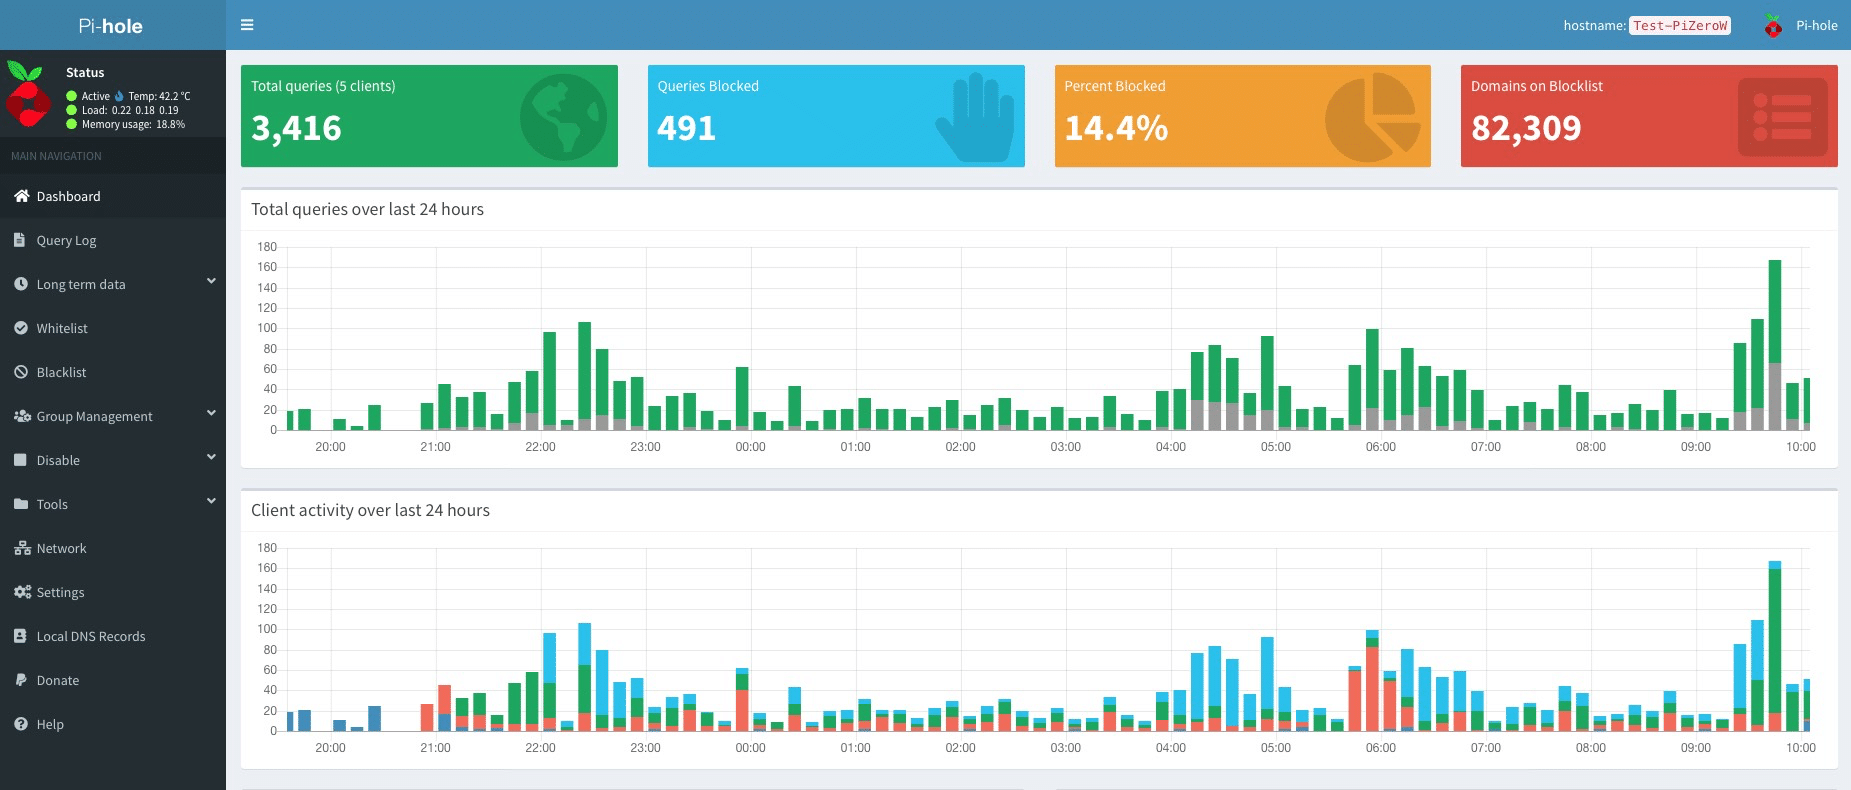
This does not end here we can further customize this as per our will. The query logging feature helps in diagnosing any issues that may seem to happen after aggressive blocking and also helps in monitoring the requests made within the network for further analysis. We can also set up unbound DNS to handle name resolutions to not rely on 3rd party upstream servers altogether increase privacy.
Once everything’s done you can either set the servers IP address as your DNS server, either on router to cover whole network or configure it device by device bases.
You now have set up a server that improved your network performance and provided a better browsing experience. We can further configure the server as per the requirements, but that is story for another time...
I hope you found this useful and are planning to deploy something like this in your environment.
Adios.
Share